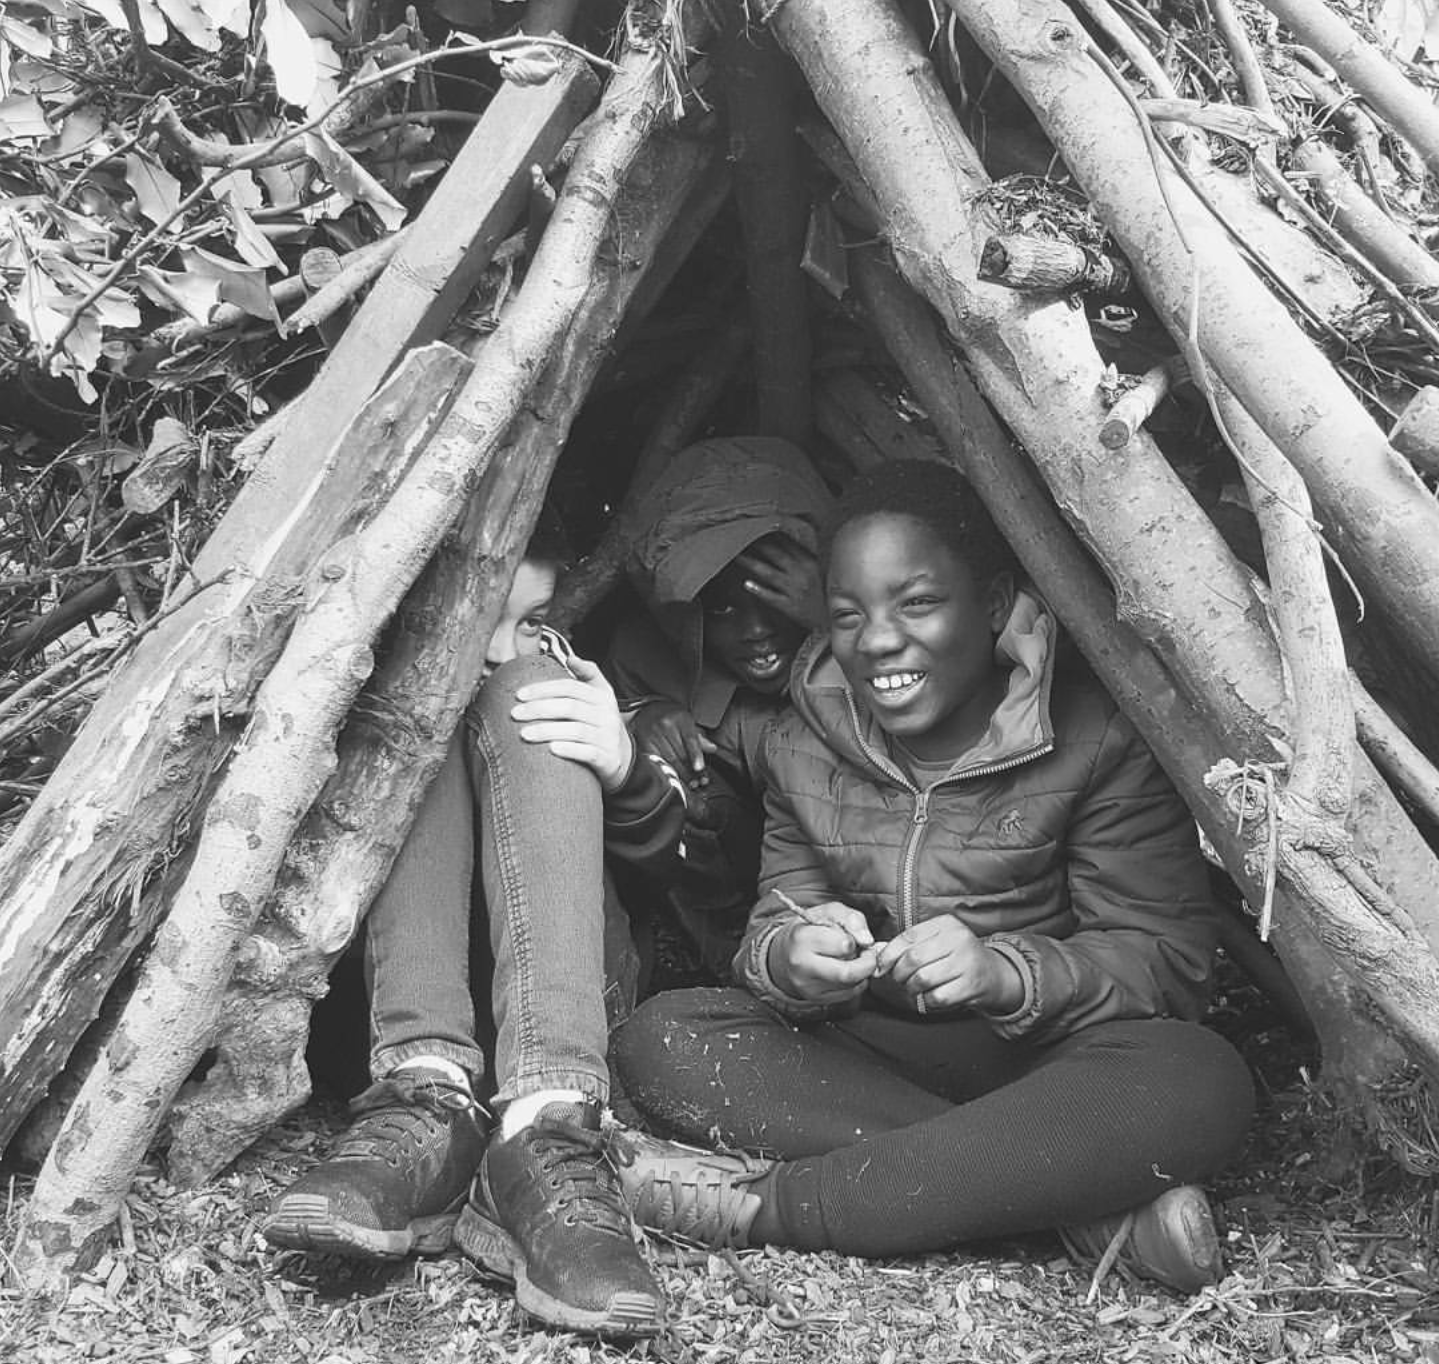
In this photograph, I wanted to capture the emotions on their faces so instead of using the zoom facility i simply moved up close to capture this shot from my phone
In an ideal world, you would hire a professional to take images of every facet of your life that matters to you. This could be photographing your young child in their precious years of growing up, or capturing some lovely moments when your on holiday with your husband or wife etc. That would be lovely, but of course, we don't live in an ideal world and the fact is that there is ALWAYS an opportunity for a great photograph to be captured.
Many people may not have the spare cash to invest in a really expensive camera, especially if your the kind of person who simply wants to take nicer photographs, rather than creating something that your going to print or charge others for. Mobile phones are the most common way for us to take pictures nowadays and they have become so advanced that you will see some photographers who create the most stunning pictures with them.
I wanted to give a few tips on how you can improve the quality of photographs that you take from your phone and I have included some examples of my photographs on this post, all of which were taken on my phone; so without further ado lets dive right in!!

This picture was taking on a lovely sunny day so i simply swung the pushchair to take advantage of this light and took my shot! It worth noting howver that the editing for this shot was conducted in Lightroom
Try not to Zoom too much
Although mobile phones are getting better at this, the zoom functionality of a phone is still a long way off where it needs to be. This means that when you zoom too far, in most cases you end up losing the quality of the photograph, so its best to try not to use the zoom facility, but if you must, try not to zoom too far. Move closer to the subject if you want to get a clearer picture of it and the quality of the resulting photograph will thank you for it.
Use Rule of Thirds
On most cameras now, when you go to take your shot you will notice that there is a grid separated into 9 parts. The purpose of this is to help you to decide how you want to frame your picture before you take the shot. Most people tend to center an image, with the face of the person they are shooting dead center. This is great and there is nothing wrong with this, however the next time you take a shot, try playing around with this to create something more interesting. Have any one of the intersections on your grid where the lines cross contain a point of interest, such as an eye for example.
If there are other things within the frame that help to tell the story this is perfect as it means that you are using "space" in an interesting way, resulting in a more dynamic photograph.

Journey to Nowhere: I took this photo on the top of a double decker bus and loved how the train track faded into the distance. By imagining the rule of thirds, you will notice that most of the top part of the picture may be seen as negative space, but it helped to create the effect I wanted to portray.

By imagining the rule of thirds and picturing a grid on this picture, i composed this shot on my phone for their eyes to meet on the first horizontal line
Think about your Composition
Composition is a fancy word that simply means that you should take a bit of time to make sure that everything within the frame of your photo is where you want it to be. Ensure that the frame you are looking for is straight and that all the points of interest are where they need to be. Take some time to remove anything unwanted, like clothes in the background and other distractions. Youl'll be surprised how drastically you can improve the quality of your photographs by doing this 1 simple thing. All that is then left to do is to hold your phone steady and take your shot!
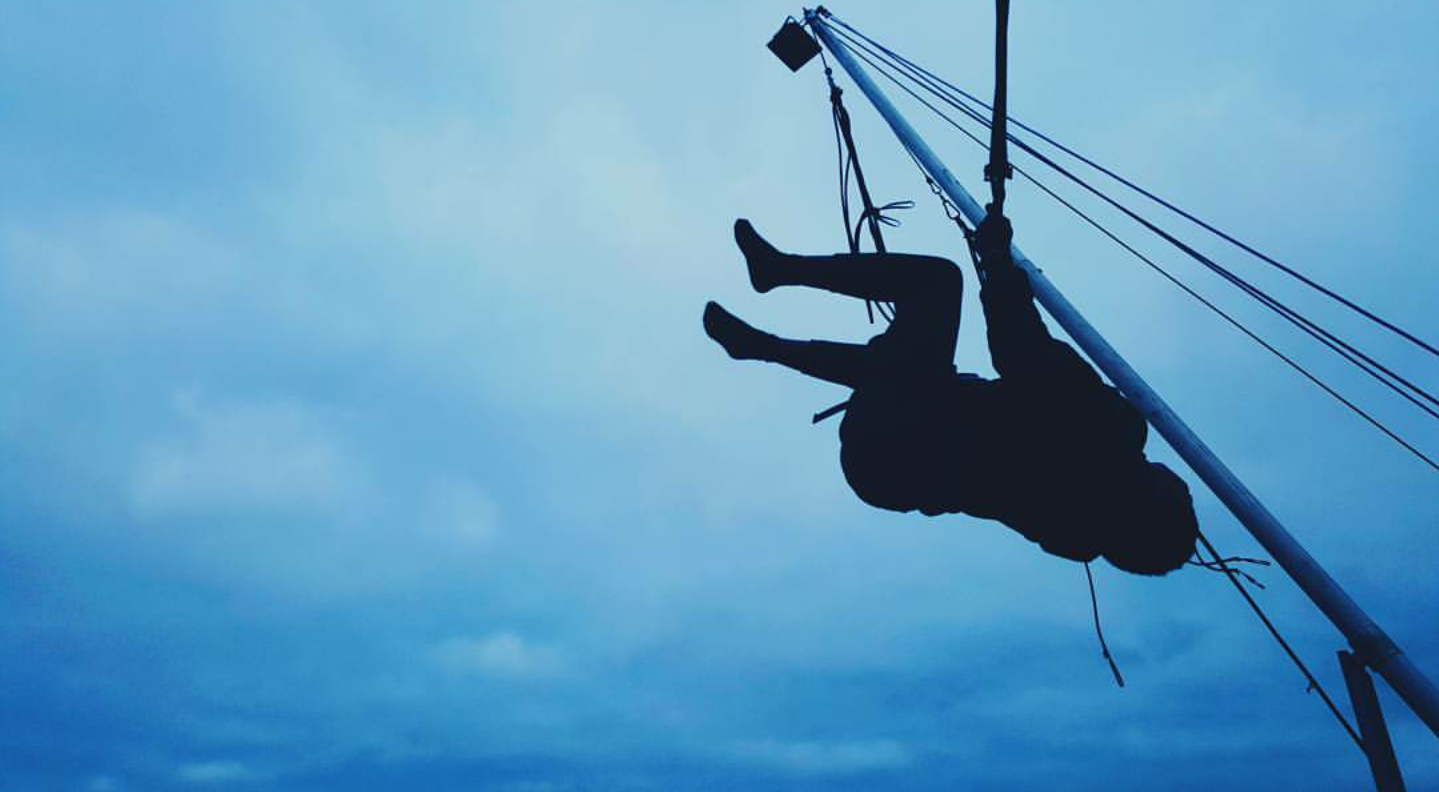
With this shot, i wanted to focus on the the height of the bunjee so i composed shooting from a really low position, whilst having him to the right and all of the sky to the left

I took this picture on my phone in Mexico and wanted to capture the palm trees and lovely water feature in the background. I also waited for the sun to be in the right place, casting a shadow off the nearest palm tree. I then carefully composed the scene and took my shot!
Avoid Flash
Even when using a professional camera, flash is the ugly automatic monster that pops up when you are shooting and should be avoided unless you are using a flash gun. On your phones camera, using flash only makes your picture look ugly, with the subjects having red eyes or the general photograph having a yellowy tinge that doesn't look very nice at all.
So what do you do when there is low light? By fiddling around with your camera settings on your phone, there should be an option for you to manually set how you want the camera to shoot. Look for the "ISO" option and take this up as high as possible. This will allow you to take a picture that will let lots more light into your photograph and will look much better than a picture taken with flash. If you find that your picture is still dark after doing this, there are simple apps that you could download that may help to make this a little better, but more on that shortly.
Edit Your Photos
If you want to add a bit of extra detail and colour to your photos, you could try downloading photo editing software that can help you to accomplish this. There are many out there and I have tried a few but the one i tend to stick with as i do not shoot on my phone that much and it works brilliantly well is VSCO cam. This can be found on both Android and is a MUCH better alternative that the automated options that are given to you when you are about to post a photo on Facebook or Instagram. Take some time to look at the filters offered here, and use some of the options such as sharpening or saturation to make your images stand out more and enhance colour.

On this image that i took on a bus passing through London with my phone,, I edited the image on VSCO to give it a cool blue effect.
Keep Practicing
So these are just a few simple rules that you can try from today to improve the quality of your pictures. Always remember, It is not the quality of camera that makes a great photograph, it is the person behind the camera, so keep practicing the thing listed above and watch your image quality improve over time!!
If you know anybody who you think would find this post interesting, feel free to share this with them! Happy Shooting.
Ps, Was there anything you think i missed or other questions you would like me to answer? Leave a comment below and I will get back to you!